Saturday, August 16, 2014

Prima Doll Tag with Couture Creations

Prima Doll Tag with Couture Creations

Hi, Bridget here again with my second project for Couture Creations as their Guest Designer for August.

I love making cards and every now & again I like to make these large tags instead of a normal card.

Using some pretty girlie papers from Bo Bunny and one of the Prima Doll stamps - Valentina I stamped her, cut her out and coloured her hair and cheeks using some chalks.


I stamped her clothes out on patterned papers and cut out all the pieces.

I covered a Prima Tag with patterned paper.


The next step I did was to cut a layer of spotted paper out to emboss using the beautiful Large Velvet Tea Lights embossing folder from the Marriot Collection (C0723669).

I then cut out the beautiful Splendour Ornamental Lace Die from the Treasured Collection. This is to go behind the tag and just to stick out a little bit for decorative purposes.


Mounting the embossed piece onto some plain cardstock I started assembling the tag, adding lace trim, flowers and the Prima doll that was now almost completely assembled. I added some of Couture Creations Pearls as her buttons.


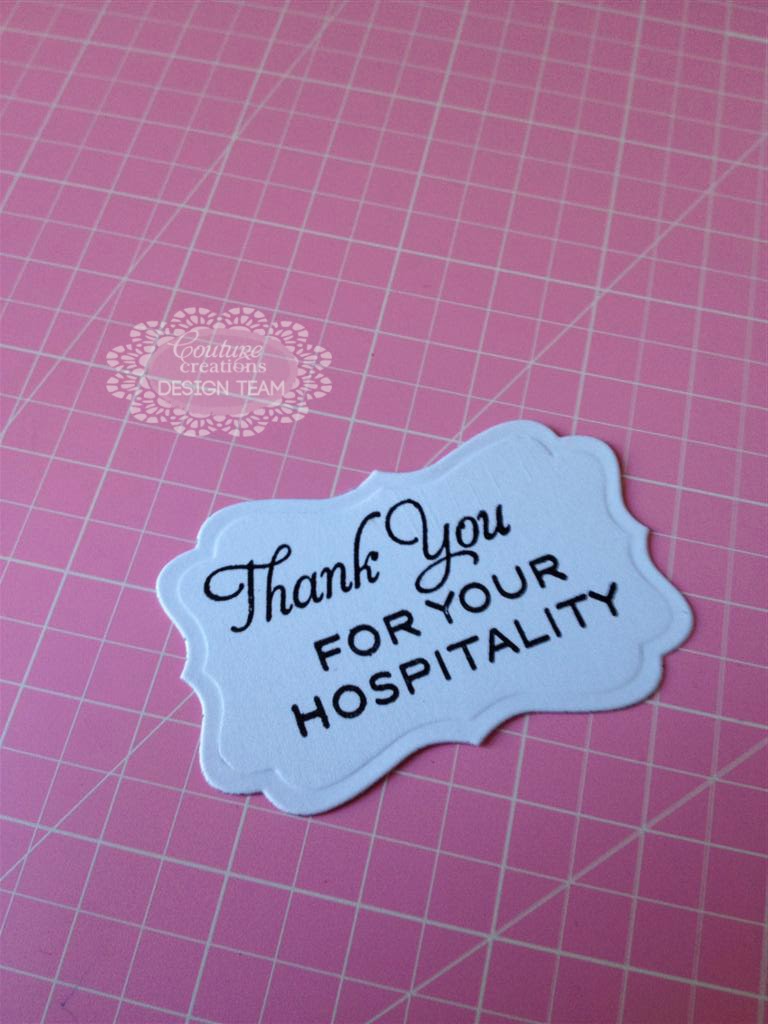
The last step was to cut a paper bow to decorate the top of the tag, adhere the doily cutout to the back of the tag, add some word fragments and the tag was all done.
Thanks for having a look at my project and thank you to Couture Creations for having me as a Guest Designer for August.

Steampunk Top Hat

Steampunk Top Hat


Hi it's Bridget here and I am so excited to be invited to be a Guest Designer for Couture Creations for August 2014. I got sent the most gorgeous dies and embossing folders from Couture Creations as part of their new releases. They inspired me to create something with a steampunk theme and I thoroughly enjoyed making this. 

I cut and assembled a top hat from a file I had purchased. 


The next thing I did was to stamp and colour a steampunk stamp that I had in my stash.


 I cut a few strips from the Cog Border die from The Metricon Intricutz Die Collection (CO723739).


Next, I cut out a shape using the Victorian Rectangles die (C0723049) and placed a Cog Border die cutout over it and inked the rectangle with Distress ink to create a watermark effect.


 The Large Wire Barbs embossing folder (C0723666) was used on this purple cardstock to create one of the focal points on the front of my top hat. I matted it on a piece of black cardstock and added one of the Cog Border die strips.


The next step was to mist some flowers to match the colour scheme of the Steampunk Top Hat.


 I let the flowers dry and then started assembling all the pieces to my top hat. I added ribbon around the top edge of the hat to cover up all the seams.

It did not take long to make this project and I think the embossing folder and dies made it look that much more "Steampunk-ish". Another winning set of products from the guys at Couture Creations.

Thanks for having a look at my project and I hope you will join me again soon with my second project as Guest Designer later this month.


Monday, March 3, 2014

Tailormade Card


Tailormade Card by Bridget Louw


Hi Bridget here with with a simple card to make thanks to the amazing range from Couture Creations products. This time I used the gorgeous sewing themed papers.

The card measures 6” high x 6” wide.
The pieces you will need to cut are as follows”

The white base layer measures 12” x 6” scored at 6”.
The turquiose piece measures 5 7/8” x 5 7/8”
The panels measure 1 7/8” x 5 ¾”. Cut 2 out of one patterned paper and one out of another.
White square 3 ½” x 4 ½” and the patterned paper is 3 3/8” x 4 3/8”.


Stamp and colour an image of your choice. Cut it out using C0723044 Nesting Dies: Oval, add a matching coloured scalloped oval using C0723045 Nesting Dies: Scalloped Oval. 


Assemble the 3 pieces onto the turquoise square and add faux stitching with your piercing tool


I stamped a sweet sentiment onto a piece of card I had cut using C0723049 Nesting Dies: Victorian Rectangles. 


Assemble the card as per the picture, using C0721963 Foam mounting Tape & C0721984 Double Sided Tape


Couture Creations products used
CO723545 Sew Jo
C0723049 Nesting Dies: Victorian Rectangles
C0721963 Foam mounting Tape
C0721984 Double Sided Tape
C0721957 Self Healing Cutting Mat
C0721986 Handheld Essentials set
CO723039 Precision Trimmer
C0723044 Nesting Dies: Oval
C0723045 Nesting Dies: Scalloped

Other products used
Big Shot Die Cutting machine
Cardstock
Stamps
Ribbon
Charm

I hope you like my card and will try making it with the amazing product range from Couture Creations.

Join us on Facebook and don’t forget to “like” our page.

My Valentine Layout


My Valentine by Bridget Louw


Hi Bridget here with with scrapbook layout to make in just an hour,  thanks to the amazing range from Couture Creations products.

The double layout is super quick and easy.
Cream 12’x12’ Cardstock x2
6’x12’ Patterned paper x2
3”x4” rectangle squares x8

Assemble layout as per the picture above. Add your embellishments and rubons, including colouring your title with whichever colour ink or paint you choose.

Using some of the beautiful new dies from Couture creations I cut 1 Mirror Mirror Ornamental Lace die (CO723242) 


and one Birdcage from the Glamour Days Collection (CO723708) to add to one of the rectangles.


I then cut the 2nd and 3rd size of the C0723221 Blossom Die and using scissors cut a spiral in it . I then rolled it up to make my own paper roses. Glue them onto your layout and in one hour you are all done.


Couture Creations products used
C0721963 Foam mounting Tape
C0721984 Double Sided Tape
C0721957 Self Healing Cutting Mat
C0721986 Handheld Essentials set
CO723039 Precision Trimmer
CO723242 Mirro Mirror Die Ornamental Lace Collection
CO723708 Birdcage Die Glamour Days Collection

Other products used
Big Shot Die Cutting machine
Cardstock
Rubons
Ribbon
Chipboard Title & Heart

I hope you like my layout and will try making it with the amazing product range from Couture Creations.

Join us on Facebook and don’t forget to “like” our page.


Easy Framed Card by Bridget Louw


Easy Framed Card by Bridget Louw

Hi Bridget here again with with another super quick and easy card to make thanks to the amazing range from Couture Creations products.


The card measures 7” high x 5” wide.

The white base layer measures 10” x 7” scored at 5”.
The darker pink measures 4 7/8” x 6 7/8”
The lighter pink measures 4 ¾” x 6 ¾”


Using the 2nd and 3rd largest square dies from C0723042 Nesting Dies: Square cut the smaller square from the darker pink, line up the lighter pink over the square cutout and die cut the larger square. 


You should now have a square window cut out with some of the darker pink showing through like a frame.


Using the 5×7 Thinking Of You Embossing Folder (CO723296), emboss the light pink layer.

Cut some marker blending card with the largest die in the set C0723042 Nesting Dies: Square.
Stamp the image you have chosen on the shape and colour as desired. 


The next step is to adhere the coloured image behind the square gap in the dark pink layer and on top of that stick down the embossed light pink layer.. 


I stamped a sweet sentiment onto a piece of card I had cut using C0723049 Nesting Dies: Victorian Rectangles and glued the sentiment on the inside of the card, using C0721963 Foam mounting Tape.
 

Super quick, super easy.

Couture Creations products used
C0723042 Nesting Dies: Square
C0723049 Nesting Dies: Victorian Rectangles
CO723296 Thinking Of You Embossing Folder
C0721963 Foam mounting Tape
C0721984 Double Sided Tape
C0721957 Self Healing Cutting Mat
C0721986 Handheld Essentials set
CO723039 Precision Trimmer

Other products used
Big Shot Die Cutting machine
Cardstock
Stamps

I hope you like my card and will try making it with the amazing product range from Couture Creations.

Join us on Facebook and don’t forget to “like” our page.


Wednesday, February 5, 2014

Faux Tie Dye Card


Faux Tie Dye Card by Bridget Louw


Hi, it’s Bridget here again with my first project for 2014. I am still exhausted from all the festivities but it was loads of fun.. The card I want to show case for you today is a faux tie dye technique using Distress paints. Once the paper has dried you can emboss it or cut dies from it using the amazing array of folders and dies from Couture Creations.
The card measures 7” high x 5” wide.

The first step is to cut the card base from white cardstock which measures 10” x 7” scored at 5”.

The coloured layer measures 6 7/8” x 4 7/8”.
Cut another piece of white smooth cardstock 4 ¾” x 6 ¾”, this is the piece we will faux tie dye.

On a non stick craft match spread the Distress paints in the colours of your choice and mist lightly with water. Sweep your cardstock through it until it is completely covered and set aside to dry. 


While it is drying die cut the second smallest die from C0723049 Nesting Dies: Victorian Rectangles and stamp your card sentiment on it. Create a bow with one or multiple loops and set aside.


Put the now dry cardstock through the Large Persuasion Blooms (C0723452) embossing folder and attach it to the piece of coloured cardstock. 


Create faux stitching with the piercer from the C0721986 Handheld Essentials set. Fill in each hole with a white pen to simulate stitches.


Adhere to the front of the card, attach the sentiment and ribbon using C0721963 Foam mounting Tape.

Congrats, your card is done, easy as 1,2,3

Couture Creations products used
C0723452 Persuasion Blooms
C0723049 Nesting Dies: Victorian Rectangles
C0721963 Foam mounting Tape
C0721984 Double Sided Tape
C0721957 Self Healing Cutting Mat
C0721986 Handheld Essentials set
CO723039 Precision Trimmer

Other products used
Big Shot Die Cutting machine
Cardstock
Sentiment stamp
Ribbon
Distress Paints
I hope you like my card and will try making it with the amazing product range from Couture Creations.

Join us on Facebook and don’t forget to “like” our page.